Friday, September 30, 2011

Pick a Flower...Outlines19

A flower from the Outlines Stamp Co. collection, a little bit of this and a little bit of that and I had my completed card.  The background for the flower stamp was made by using Mica Gloss brayered on glossy white cardstock.
Supplies:
Stamp:  Outlines Rubber Stamp Co.
Paper: My Mind's Eye and misc.
Die Cuts: Spellbinders, Heartfelt Creations
Ribbon: May Arts Silk
Misc: Dew Drops, Stickles

Monday, September 26, 2011

Boxed Birthday Card


This week Joan's Garden issued a challenge to make a "purple" birthday card with a 3-D embellishment that could be presented in a box following Selma's direction.  Easier way to explain it all is to just visit her website here: http://www.atjoansgardens.com/2011/09/this-weeks-challenge.html Thanks Selma for directions that were fantastically easy to follow (at least I made a box!).  What fun to decorate in theme (purple) - a perfect way to present a special card.  Almost square, but not quite, the card fits snugly in the below pictured box.  The background paper is some I made using black glossy cardstock and Luna Lights Paints.  Crystal swirls, 4 pices of ribbon (don't forget to cound the light lavendar May Arts Silk ribbon beneath the white lace), A very 3D shades of purple flower  (every  picture I took the purples turned out pink...I don't know why???) and some lavendar Zing embossing powder to heat emboss the Just Rite Happy Birthday Stamp and the card is done. 
The box was made following Selma's directions then completed byframing a flower,  Heartfelt die cut -Swirl, a few dewdrops on a ModPodge enhanced doily.

Thursday, September 22, 2011

Lots of Halloween Layers with Outlines #18

 
 Supplies:
Stamps: Outlines
Paper: Cardstock, Kaisercraft, Moulin Rouge
Misc: May Arts Ribbon, Copic Markers, Pop Dots
        Stickles, Smooch, Crystal Effects

This card was made by stamping central image 5 times, then cutting out the different layers. Using pop dots to give dimension.the layers were put back together.  Lots of layers:  9 paper; 3 ribbon were mounted on a card base.


Showing layers

Tuesday, September 20, 2011

Plastic with a Repurpose! A JustRite Challenge57

Repurpose a 2nd time!  I had just received a new Spellbinder die this morning and thought I'd use the plastic casing for a "acetate" card.  After cutting the top, bottom and right side of the case to card size.  Repurpose some more?? Well, I'm taking care of a beloved 10 month old grandaughter.  That means baby wipes on hand  lol!  I did modify the "repurpose" and used a brand new one...  I too the JR Quiet Moments stamp and stamped it on the wipe.  After it had dried out just a bit, I colored (with a very light hand) it with Copic markers, then cut it out.  Back to the card.... I used a small frame stamp from JR cling set and stamped a background over the front of the card.  Next I positioned the baby wipe picture and taped it down. ....To hide the tape on the inside, I repurposed magazine pages that I cut in circles just the same size as the stamp's moon. and matched them on the front inside and the card inside and back.  On the inside circle.will be my greeting message. I can't say the flowers, dew drops, ribbon, or Swarovski crystals are "repurposed", but they are leftover from other projects...does that count?

Repurposed Can Lid

The JustRite Challenge this week was to repurpose a household item into something else.  I was opening a can of tomato paste, but any can lid would do.  Using my cricut I cut paper circles to fit inside the inner rim of the lid. I cut a second circle and then a third just the size of the JustRite stamp.  I then filled the lid with Crystal Effects and outlined the rim with stickle.  Now comes the uh oh part.  After the Crystal Effects had dried for a couple of days and the image was clear, I wanted to glue a piece of sparkly ribbon to the back.  To ensure contact between the lid and the ribbon I placed my JustRite block on the lid.  In the morning I went to remove the block and it was stuck!  OH NO!  What to do?  I took my heat gun and working carefully heated and gently removed the stuck surface.  It wasn't smooth anymore ...  so sad!.  Turn lemons into lemonade?  I took the heat gun and  reheated the surface.  Little bubbles formed and now it looks iced!  But terribly hard to get a good picture....sorry.  Anyway, reusing a can lid opens up all sorts of possibilities....I will use this one as a Tag....stamping To:/From on the back, but it could be turned into a magnet by gluing a magnet disc on the back, or an ornament, or......

Sunday, September 18, 2011

Santa Claus is Coming to Town

Joan's Garden Challenge #2
Striped paper...check
Sentiment embossed in Gold...check
Embossing background using Selma's technique...check
Christmas theme....check
     These criteria together are the requirements for this weeks challenge at Joan's Garden.  An early Christmas card is now made...Yeah!
Supplies
Stamp:JustRite
Embossing Folder: Sissex
Embossing powder: Zing gold
Ink: Stampin Up Summer Sky, Memento Black, Embossing
Paper: My Minds Eye, Silver Flake
Copic Markers
Prima flower
Gemstone

Saturday, September 17, 2011

Feels like Fall Outlines 17

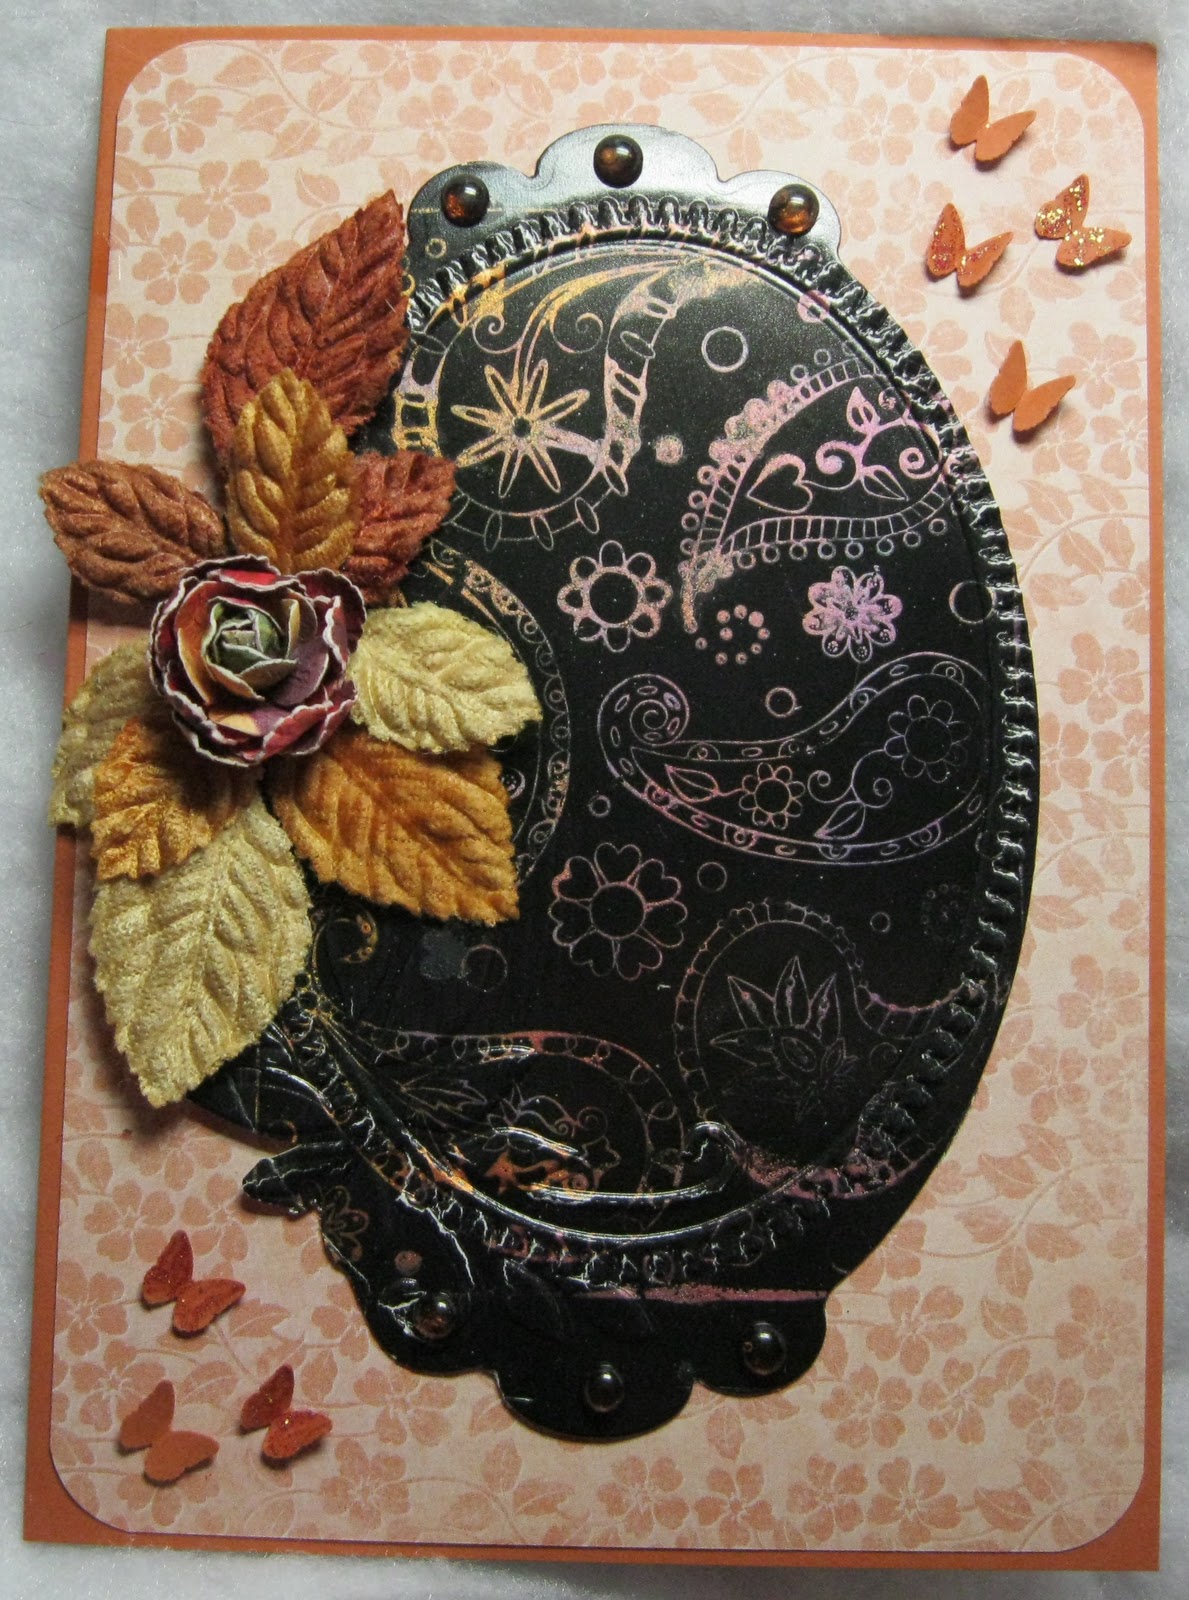
Even though temperatures around here still hover in the 90's....it is beginning to feel like fall.  The bright summer colores are fading to muted shades, Monarch butterflies are heading south, fall flowers are budding, and leaves begin to acquire their colorful coppers, yellows, and browns.   Outlines challenge (http://outlineswithkathy.blogspot.com)  inspired this card. 
Supplies: 
Stamp:  Outlines Rubber Stamp Co.
Cardstock/Paper:  Black Glossy, Graphic 45
Misc: Martha Stewart Butterfly punch, Sissex embossing folder, Spellbinders Label 10, Prima flowers/leaves, Dew Drops, Luna lights paint.
Technique: Brayer paints on teflon craft sheet to create "stamp pad", transfer to stamp then stamp on glossy cardstock
 ...Ready and waiting for Fall!

Thursday, September 8, 2011

Picture This 16 Butterfly on Sunflower

Outlines challenge this week ( http://outlineswithkathy.blogspot.com) was to incorporate a picture in your design.  I'd recently seen a technique that took multiple copies of a photograph and used them to create a mock "iris fold" card.  This sunfower grew from a seed knocked out from a birdfeeder and seemed perfect to use it to create my challenge entry.  Lots of time later, the Outlines butterfly was stamped on yellow and cut out, wings folded up and glued to the photo frame.  The layers of the flower and the layers of the frame were attached to a white cardbase that had been embossed with a Cuttlebug embossing folder. 

Tuesday, September 6, 2011

Shabby Chic JustRite057


JustRite's challenge this week was to create a Shabby Chic card.  Feminine, weathered and worn.  So off I headed to my old stash of stuff....Feminine: the ribbon roses I made accented with pearls; the weathered and worn: sanded embossed Core'dinations. Framed with eyelet lace and mounted on additionally embossed/sanded Core'dinations before attaching to a card base.  The Just Rite stamp Thinking of You was stamped on a piece of shabby Annalee paper, then torn following the circular border. 

Supplies:
Stamp:  Just Rite: Just a Note
Embossing Folders:  Cuttlebug, Marianne Designs
Paper: Weathered Core'dinations, cardstock, Annalee
May Arts Ribbon
Pearls
Lace Ruffle
   

Friday, September 2, 2011

Bordering a Pumpkin


Borders along the top, sides, bottom??? Just Rite challenge 015 is to incorporate Beautiful Borders.  I decided it was time to visit te Pumpkin Patch to create this shaped card.  The largest  Spellbinders pumpkin die was used to create the card base. (I traced around it and cut it out to make it 1/4" larger than the largest die).  The first layer was the largest die used on vellum.  An outlines border vine stamp was used to stamp around the "border" of the pumpkin, then colored with Copics and enhanced with Stickles.  The next largest pumpkin die cut a piece of orange cardstock with was then "bordered"/distressed.  with Stampin Up Sage ink.  The final step was to use Outlines Jewel It Pumpkin 3 times, cut layers, coat with Crystal Effects, apply Swarovski crystals and color the stem with Copic markers.  Does this pumpkin card border on pretty?

Patterned Paper Hummingbird


At Joan's Garden we were issued a challenge to create a card following the technique demonstrated by Heidi Blankenship: stamping on patterned paper.  Off I went to thumb through my million (probably) sheets of paper.  I chose this subtle floral flourish and paired it with a Sizzex embossing folder, Tapestry Stamps, Heartfelt Creations Hummingbird Stamp, and May Arts sheer ribbon. Inks from Memento and Stampin up were used.  The Hummingbird was stampe on vellum.  the image was colored with Copic markers, then flipped over and dry embossed to add dimension.  Kaiser craft pearls were used to embellish the frame.  What a difference from the original piece of patterned paper!